Showing posts with label shibori. Show all posts

Monday, August 6, 2018

Dying scrap fabric and making small zipper bags

Over Memorial Day weekend I decided to dye some scrap canvas that I had sitting in my studio. The canvas was from some heavy canvas totes that were defective and the company sent me replacements. They did not want me to send back the defective tote bags. I kept thinking that I would make something with the fabric but I was not sure what to make. So I started by doing some Shobori wrapping designs. I'm kind of infatuated with indigo but since I did not have indigo I used some nice deep blue fabric dye that I had bought last year. We started by wrapping the 14x15 pieces of fabric in different ways to create various patterns on the fabric. We soaked about half the pieces of fabric in water before putting them in the dye as that is what the directions suggested. 

We found the fabric soaked in water took the dye more in the areas where we had expected the fabric to stay white in keeping with the Shibori patterns that we were making. You can see the pieces above the pieces on the left were not soaked in water, the pieces on the right were.


I liked the fabric that was not soaked in water before going into the dye as the contrast is stronger and I believe there is a clear design in the patterns. 
Our quilting guild is making small toiletry bags for a couple of charities and so I decided to make some from the heavy canvas. With the canvas you do not have to use a heavy interfacing to make the bags stiff. 
These other dopp bags needed some stiff interfacing to make them form a box like bag. I like making these bags as they are simple and cute, take less then 1/2 a yard of fabric and a zipper. So far I have about 6 bags to give to the quilting guild. The patterns are free on line. The large dopp bag is on Craftsy, the other zipper bag is free on Noodlehead.

Monday, April 18, 2016

Red, White & Blue Alabama Chanin Skirt


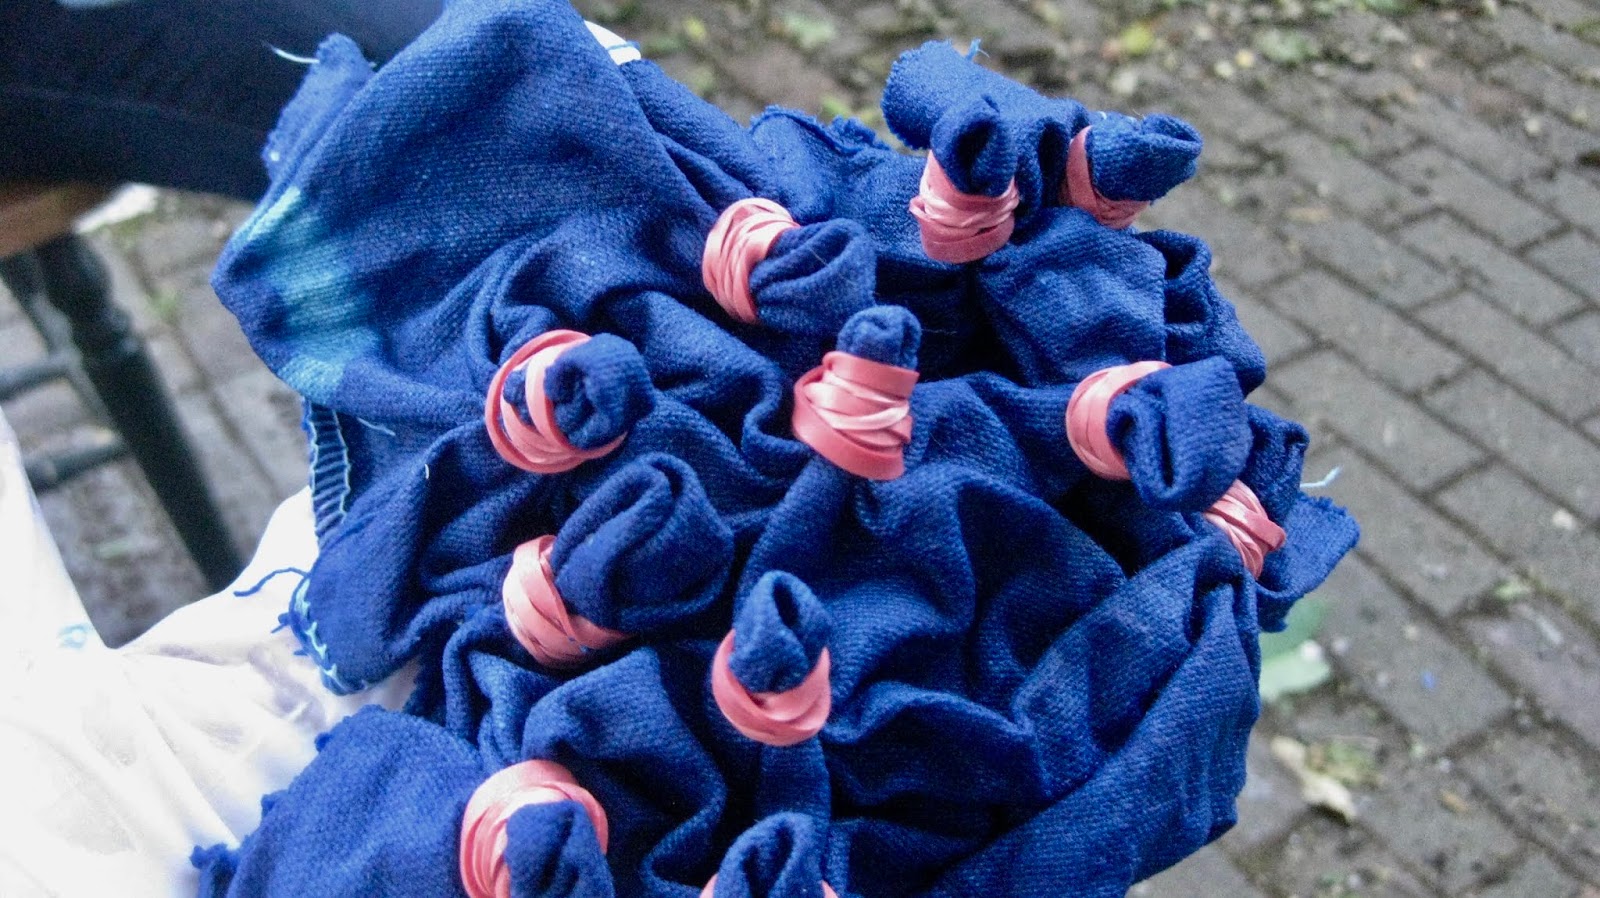
This skirt has been in the making for over 2 years. I originally dyed the red fabric in the summer of 2014. I was experimenting with Shibori tie dying. I bought some white cotton jersey from Dharma Trading for the dying process. I folded a yard of the fabric like an accordion then used several rubber bands to hold the fabric together. I like the red design but it had a little too much white for my wardrobe. I thought the fabric would be perfect as the bottom layer of an Alabama Chanin Bloomer Skirt, my favorite of all the Alabama Chanin skirts, I have 6 of the bloomer skirts. Some in the original leaf pattern and some in the paisley pattern. I wear these skirts almost every day, for everything from gardening to going out to dinner. 

The bookstore I worked at use to give us a t-shirt every year. After 25 years I had enough shirts, so I ordered a 6xl shirt, knowing that I would be able to use the fabric for something else. When I ordered the shirt I did not know what color it would be, when I got the shirt I though it was the perfect  blue color to go with the dyed red & white fabric.  

When I saw the New Leaves Stencil I knew that what pattern I would use on the top layer of the skirt. That took me another year to figure out who to get the pattern on the fabric. I was going to teach myself to use an airbrush but after a couple of attempts I realized that screen printing was way easier. I attempted to locate some rubylith, but it turns out that it's a lot more expensive then I remembered. I needed a very large piece and the only rubylith that would work came in a roll that was about $300. OK...I needed another way to get the new leaves design on my screen. I printed out the stencil from the latest Alabama Chanin book at Kinko's. It's large 25x40. I tried just burning the screen with the paper stencil but it did not work. So I decided to use a drawing fluid on the screen after drawing the images on the screen. Again it was problematic as the drawing fluid was old and a little too thick. I did end up making a screen and printing on the blue fabric but it was a lot more work than I had anticipated. The first color I used was a blue because I didn't want the ink to stand out too much. Well the blue ink I used matched the fabric perfectly and I was unable to see the stencil on the fabric. So I had to screen the skirt again...this time I used black. 

Now I had the skirt ready to sew. I spent a week stitching so I could do a reverse appliqué on the skirt. I started to cut out some of the design and my husband suggested that I not cut out all of the stencil but cut the stencil so it looked like vine wrapping around the shirt. I like that idea but I wanted he full impact of the red & white dyed fabric...so I cut out all the stencil. I may make another one with a vine type of design flowing around the skirt. That is another skirt for another post. 

The final result is a Red, White & Blue Skirt...it's my 4th of July out fit this year.