Thursday, May 28, 2015

Red Gingham Western Shirt for ME!!

I made a fairly simple shirt for me. I have made this same pattern several times and really like it. It's on older pattern McCalls 6383, by the looks of the collar I would would say this pattern is from the late 70's. I had some lightweight red gingham fabric that is a cotton poly blend. I later realized that I also had some nice red eyelet fabric that would have made a nice contrasting yoke.
I did have some problems with the pockets since they were cut on the bias. When I turned under the edges the pockets got wonky and large. I decided to not sweat it and sewed them in place thinking that they would be fine. Good thing because once the shirt was finished and washed the pockets did not look funky at all. Everything worked out nicely. 
The gingham is very small so the detail is not obvious, but yoke is cut on the bias too. This is where a nice red eyelet fabric would have stood out if I really wanted to make it look like a western shirt. I'm already looking through my fabric to see if I have more gingham. I found some pink but not sure if the red eyelet will work with pink. I also want 100% cotton. Thought his fabric is nice and light because it's a cotton poly blend it does not breath as well as 100% cotton. I was hoping for a nice light summer shirt to wear over tank tops this summer. We shall see as the days get hotter. 
This pattern has a large cuff too. I was smart this time and shortened the sleeves. The last few shirts I have made the sleeves are about 1" too long. That tends bother me and I end up rolling up my sleeves. When the sleeves are rolled up then you don't see the detail. I also wanted a shirt that the cuffs would not get wet when washing hands or dishes. I think I got it right on this one. 
The shirt it's self is very basic, it's a little baggy. I think I need to add darts to pull it in a little at the waist. Because of the pockets I don't want to put in bust darts but some darts on the back would make this a nice fitting shirt. I also want to try this pattern in a lawn fabric and make a straight hem. That way I can wear the shirt with skirts. I have never liked the way shirt tails look when wearing skirts and since I have gotten older I have added some extra pounds to my waist and tucking in a shirt is not an option. 
Now my favorite part...I love these snaps. I bought them a couple years ago up in Vancouver BC. There is a great fabric shop called Dressew, it's in the downtown area and only accepts cash or debit (which american debit cards do not work there so if you are coming from the states bring cash). They have a large selection of fabric but an even larger selection of sewing notions. I bought these snaps for $.49 a package, there were 7 snaps in the package so even buying 2 packages it was cheaper than what they sell for in Portland. Here in Portland a package of 12 snaps would cost $5. When I bought these snaps my husband said "what are you going to use those for?". I thought he would like them on his shirt...OH NO...he did not like them. So they have sat in my sewing studio for 2 years. When I was looking for what snaps to use on the shirt I pulled out these gems...they were perfect. 

Tuesday, May 26, 2015

New Alabama Chanin Dress


I received the latest Alabama Chanin book " Alabama Studio Sewing Patterns" in early April. I was a little frustrated at having to print out the patterns myself.  I have copies of the patterns from earlier books, but I really wanted the A-line dress from the most recent book. I finally took the CD to Kinkos and had them print out the A-line Dress, the Coat, a circle stencil and the new leaf stencil. It cost about $40 for the 4 large printouts. One of the frustrating thing about multiply sizes on one sheet is that sometimes you forget what line you are following. I think I saw this tip in a Craftsy video...trace the size you want to cut out in a specific color. I decided that red was the easiest since I had a large red sharpie handy. I then put the pattern paper under the pattern and use the tracing wheel. The nice thing about the tracing wheel is it leaves a line of dots on the pattern paper...if you are lucky the color you used to trace your size will bleed through a little making the lines easier to follow. Once you have the pattern for your size cut out you can put the pattern away till you need a different size. 


I cut our a large dress because the jersey fabric I used was very stretchy. I think it had spandex in the material mix. That was nice because it will keep it's shape longer, where as 100% cotton jersey will stretch out too much sometimes. Anyway I added pockets to this dress and I'm kind of happy with the results. I cheated on this project because I didn't want to put a lot of time into the dress, so I serged the dress. I hand stitch the bias tape on the neck and arms. I will make this dress again. I also want to try some of the new tips that are given in the latest book. Things such as color blocking and pockets. These dresses are so easy to make and the most comfortable pieces of clothing I have in my wardrobe. I really want to try to make the coat next. I think a heavy jersey such as a sweatshirt material will make a fun short coat, it will keep me warm on chilly evenings but look better than a hoodie. I can also do some nice details on the coat to dress it up a bit. 

Wednesday, May 20, 2015

Storage

It seems that I never have enough storage. I try to purge items but things pile up and then I scramble to find ways to store what has come into the house. One thing that keeps coming in is fabric. I'm addicted to fabric. My husband refers to my sewing studio as his own personal fabric store. 
I try to store my fabric in plastic tubs but those look kind of ugly. I like to have pretty containers for storage. Recently I revisited the idea of using old drawers for storage, it was something I saw in a Martha Stewart magazine years ago...accept she used the drawers/boxes under a bed and added covers so items in the boxes would not get dusty. When I first moved into my house the kitchen had 6 very large drawers for storage, the drawers were 16x28 by 8" deep. Some items went into the drawers never to be seen again. When I finally remodeled the kitchen I kept the drawers to store framed art work. The drawers proved to be a little too large for some of the art work so I recently bought some smaller drawers for my art and I wanted to use the large drawers for storage of glass wear and other items such as fabric. I attached wheels to the bottoms of the drawers so I could wheel them under metal shelving and under my sewing table. 
The drawers above were my first attempt to see if the idea would work. The top storage drawer has a lot of glass objects that were sitting on the floor in our basement. Putting the items in the drawer made it easier to find something with out having to pull everything out and risk breaking something. Now I just roll the drawer out from under the shelving unit and look inside. I can also stack a lot more items in the drawer and not risk breaking items. The second drawer was used for my large bin of fabric scrap. The large blue plastic storage container lives under my sewing table and now I can wheel it out and look through the container. It makes life so much easier. But they are ugly drawers....I did not want to put a lot of effort into cleaning up the drawers unless they were going to work. So I left the drawers "as is". Till last weekend......


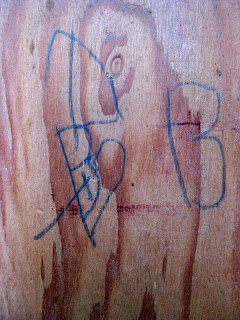
I pulled out another large drawer to convert to rolling storage.  First thing I had to do was add small pieces of 2x4 to the bottom of the drawers. The 2x4s were attached from inside of the drawer and are going to be the base for the wheels. I thought for some reason that these would look nice refinished & I started to remove the paint. It turned out to be  a lot more work than I wanted to put into this simple project. The paint was difficult to get off the drawer and I was impatience. So I ended up sanding a little to get a smooth finish and started to paint. Inside the drawer was a cute drawing...Not sure what it is...a B B and a heart? 

I had to put on 3 coats of a light aqua paint on the drawer before it looked good. I added the wheels, cleaned the drawer pulls and voila...I now I have a nice storage drawer for my scrap jersey. It rolls out of the way under the shelving when necessary and it looks nice. Now I may have to go back to the first set of storage drawers and get them cleaned up. A nice light coat of paint makes a HUGE difference.

Thursday, May 14, 2015

Another pair of pants for my husband, a new car and kids playing dress up


It's been a while since I have written anything, sorry for my absence. I have been busy with some spring cleaning. I need to clean up my sewing area and make a nicer design board for laying out my quilts. In the mean time I made a pair of linen pants for my husband. He really liked the last pair of pants and wanted something nicer. So I went on-line late one night and bought some linen from fabric.com. I try not to buy fabric on line but fabric.com also had some of the Violet Craft Waterfront Park fabric in stock, specifically the bridges in yellow. So $150 later I had ordered the Violet Craft fabric a couple of nice 100% Linen fabrics and a few yards of knit fabric. I had to go buy a pants and I was off. I cut out the pattern and installed the zipper...I'm very happy with my zipper installation. Front zippers are not easy and it takes me about an hour to put in the zipper. After a few more pairs of pants for my husband I think I will get it down. The pattern is Vogue 8719, same as the last pair I made for my husband. He wanted cuffs and back pockets. I was going to put in patch pocket but he wanted welt pockets and I have never installed welt pockets...so all he got was the cuffs on this pair of pants. When putting in the waistband I tried to make it so I could enlarge the pants in the waist band, you know when you see mens pants that all you have to do is let out the back waist band and voila..larger or smaller pants. Well in the process of trying to line up the back waistband I didn't pay enough attention to the front and I was off by about 1/4" on the front waistband. It's a good thing no one will be looking that close at my husbands fly. He loves the pants and wore them for a week before he would let me wash them. I was having some problems with my serger so not all the seams were serged. When I washed the pants I had to cut off the unraveled threads on the inside. I did zigzag the inside seams so that helped, but next time I make something out of linen I will be serging all the edges of the fabric before I start to sew the pattern together. It makes for a much nicer interior. 

We bought a new car...a 1978 Cadillac Fleetwood with red interior. It has an 8 track player and came with some country tapes. The car is HUGE. It's a gas hog but we really don't go very far, mostly to the store or the bar. We still have the little Santa Fe for long trips if we need it. My husband really wanted a new Cadillac, he had been looking on line for a couple of months. When he came across the 78 he was very excited. We drove up to Battleground to look at it, a very nice older gentleman was selling it for $2500, we got it for $2000. It needed all new tires (that is $500 alone). So there it is...our HUGE 70's car...we can fit 8 people in the car and a couple in the trunk. 

The other night was our friend Jessie's birthday. All the kids came running over to play in the yard and then got excited to play in the basement. They got into the dress up clothes and came out in several outfits. The last set of clothes they had found the strange box of masks, gloves and hats. They all had a great time and even cleaned up the mess. I think we are the strange old couple that lives down the street and these kids will remember these type of evenings for a long time. 

Tuesday, May 12, 2015

Using scrap wood


I love the idea of using scrap wool to create something unique and different. Recently I found a website that has some amazing projects using salvage items. I originally found the post making an Open sign out of scrap pallets.  I have not made this items yet but it's on my to-do list. Pallets are easy to find in my area as I live in North Portland near several industrial buildings. I wanted to try making a sign for my garage that is the shape of a cupcake, using the lights around the actual image.

Here in Portland we have a couple of different places to get salvage items. One great place is Rebuilding Center, a non-profit business that accepts almost any type of scrap building material. They were founded in 1998 by a group of volunteers that was tired of seeing good material going to waste. So many companies and builders were dumping decent material after a job was complete because they had no other option. Houses were being torn down and dumpsters filled with wood that was still useable. Rebuilding Center keeps tons of useable material out of the landfills.

Another location to find fun salvage material is a business in Kenton called Salvage Works. Salvage Works does deconstruction of old houses and barns. A team of folks then prepares the material for resale. The top two photos above are from Salvage works before they moved into their new home. I really liked the way they used old legs from chairs, yardsticks, wooden wine boxes & photos to make the wall interesting. The bottom photo is from a wonderful hotel down in Astoria called Commodore Hotel. The wall is made up of books, shells, tools and other fun items. The Commodore Hotel has the most comfortable beds I have ever slept in, it's a very nice place to stay if you are in Astoria, Oregon.


I'm hoping to create a cross between the different walls in my sewing studio. I recently bought some old drawers from the Rebuilding Center and attached them to the basement walls...it's not exactly what I want but it will work till I get more material to cover the entire area. The problem is the electrical panel is on the wall as well as a couple water pipes, making it difficult to work around.  I'm thinking that some scrap pallet wood would be just the thing to fill in the open areas, currently I have sheets and table cloths stapled over the insulation in the walls. I like the idea if uing old drawers as shelves but since the wall is so uneven and strange I need to come up with an over all cover then reattach the drawers as a nice display. My husband is going out of town this weekend so I may go scraping while he is gone. He really hates it when I bring home strange scrap items, so I have to work quickly.