I started seeing ice dying a couple years ago on different blogs and thought "that looked cool". I never got around to trying it till recently when Anna Joyce talked at my quilting guild. She had some lovely pieces that amazed me and when she talked about the simple process, I was hooked. I had to try it as soon as possible.
So I soaked a couple of cotton t-shirts in 1 cup of soda ash and about 2 gallons of warm water for about 20 minutes. I also soaked a small piece of heavy canvas. I like to use extra pieces of fabric to test processes when I'm working with dye. Anna Joyce had also done a really pretty piece of fabric that she sprinkled some dye on the fabric and achieved a kind of confetti effect.
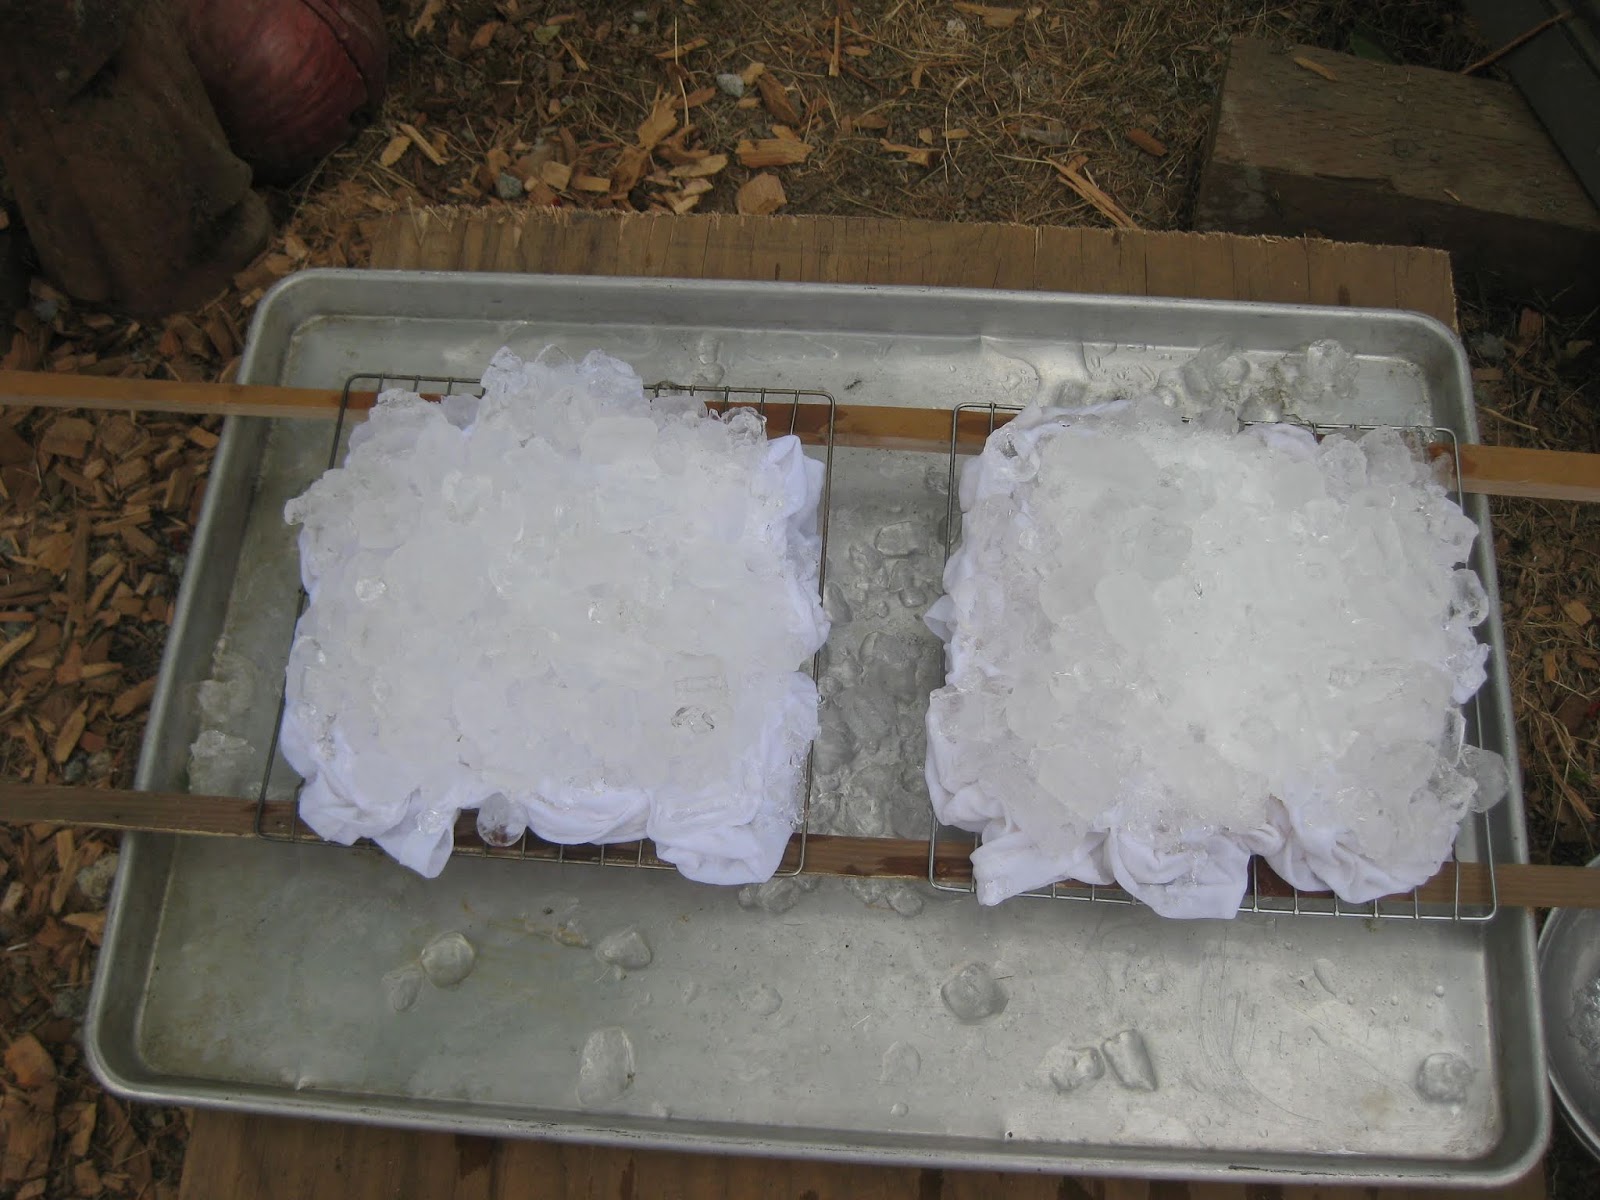
I used two different dyes. One was Dharma Trading fiber reactive dye and the other was Precion Fiber Reactive dye. Both are almost the same but since results can depend on the supplies you use I wanted to use these dyes separately so I could better judge the results. I scrunched my shirts on wire racks & covered them with ice. I have seen other people use large Tupperware containers and I think that will work better next time as you need a way to hold all the ice on top of the fabric. Mine kept falling off the sides and so there seemed to me a lot of white showing around the edges of my fabric.
I used Dharma Trading Caribbean Blue #132 & Baby Pink #12A on the t-shirt.
I sprinkled about 1/2 teaspoon of each color sort of randomly on top of the ice, some of the dye went directly on the shirt.
I used Procion Pale Aqua #210 Peach #180 & Aqua Marina #069 on the v neck t-shirt..about 1/4 teaspoon of each color.
The Peach looked a lot more orange than I wanted, and the Pale Aqua looked lot lighter that I expected when I sprinkled the dye on top of the ice. But since dyed items always change color a after the process is complete I waited and hoped that I would get something that I liked.
I used Dharma Trading Baby Pink #12A & Wedgewood Blue #76 as a sprinkle on the fabric
I put a 1/4 teaspoon of each color in a spice jar with lid that would sprinkle the dye sparely. I used less than a 1/8 a teaspoon of each color.
One thing that was interesting that Anna Joyce mentioned was that the dyes will separate in ice and when you sprinkle the powder because of the chemistry. You can see in the photo below that there are some yellow spots that appeared when sprinkled the Baby Pink color.
There was also talk of using different types of ice, grated ice would melt faster meaning that the dye would soak into the material a little sooner than the large pieces of ice. I also read that grated ice would leave a little different design. So I grated some of the ice that I put on for the v-neck shirt & used the Procion dye with the grated ice. But on the day I did my dying it was about 70 degrees and it rained ever so slightly. So the ice did not seem to melt any faster on the day I tried this process. I think a warmer day will produce a little different result but I can not be sure till I test it again.

Pieces after about 10 hours of sitting outside. On the left are the larger pieces of ice, they are not completely melted. On the right is the shirt that I used mostly grated ice and you can see all the ice has melted. You can also barely see the pale aqua on the fabric, it's below the orange and right of the aqua marina...where the large white spot is located. I love to test processes and sample patterns but the hardest part of this process was leaving the dye on the shirts for 24 hours. I get impatient waiting and really wanted to see how these shirts would dye. I left the pieces in place overnight and checked them at 10am the next morning.
You can see that the colors did lighten up a little over night so there was hope that the colors would mellow after a wash. I really was not looking forward to a patch of bright orange, I wanted a soft peach color.
Once washed and dried the shirts came out nice, the peach was more of a peach and not so orange. On a scale of 1-10..I would give these a 7, as I think I learned a couple of things that I should do different next time. I do want to try it with all one color and maybe do a shobori design on the material.