Showing posts with label block. Show all posts

Monday, February 22, 2016

A Kitten Quilt


I received Elizabeth Hartman's quilt pattern "The Kittens" for Christmas. Since made her Fancy Fox quilt before the holidays and really wanted to try the kitten pattern. When I looked at the pattern I saw that there were a lot of small pieces. The eye's and noses are 1 1/2 x1 1/2 inch pieces. That scared me as I had tried some of Tula Pinks City Sampler 100 Modern Quilt Blocks and I did not do well with all the small pieces. I also have a hard time cutting out small pieces and made some mistakes when I was cutting. 


In several of the blocks you need 3 1/2 x 3 inch piece as well as 3 1/2 x 3 1/2 inch piece...so I had to be very diligent about marking and separating the pieces for the blocks. I cut out one block at a time then sewed it together, then another block and sewed it together...you get the picture. It was very time consuming but it kept me from making too many mistakes (of course there were a couple mistakes, but that is to be expected for the first time). I would also lay out the blocks so I knew what piece when where...this helped keep every thing organized.
I also marked my sewing line on the fabric when I first started making the blocks, it really helped me get a straight line when sewing the angels. After you make a few of these you don't need to mark the fabric but when you first start out it really helps. 

You can see that the marked line will disappear when you stitch the pieces together so no need to worry about the lines showing, they are all in the seam.  

This is a really cute quilt block and it's worth taking the extra time to cut the small squares and make the blocks. The final size of the block is 8 1/2 x 10 1/2. Mine are a little off but I can manage that when I add the sashing between the blocks. I may even get ambitious and make the glasses to go on one of the kittens. 

Tuesday, June 30, 2015

Jam & some Churn Dash Blocks


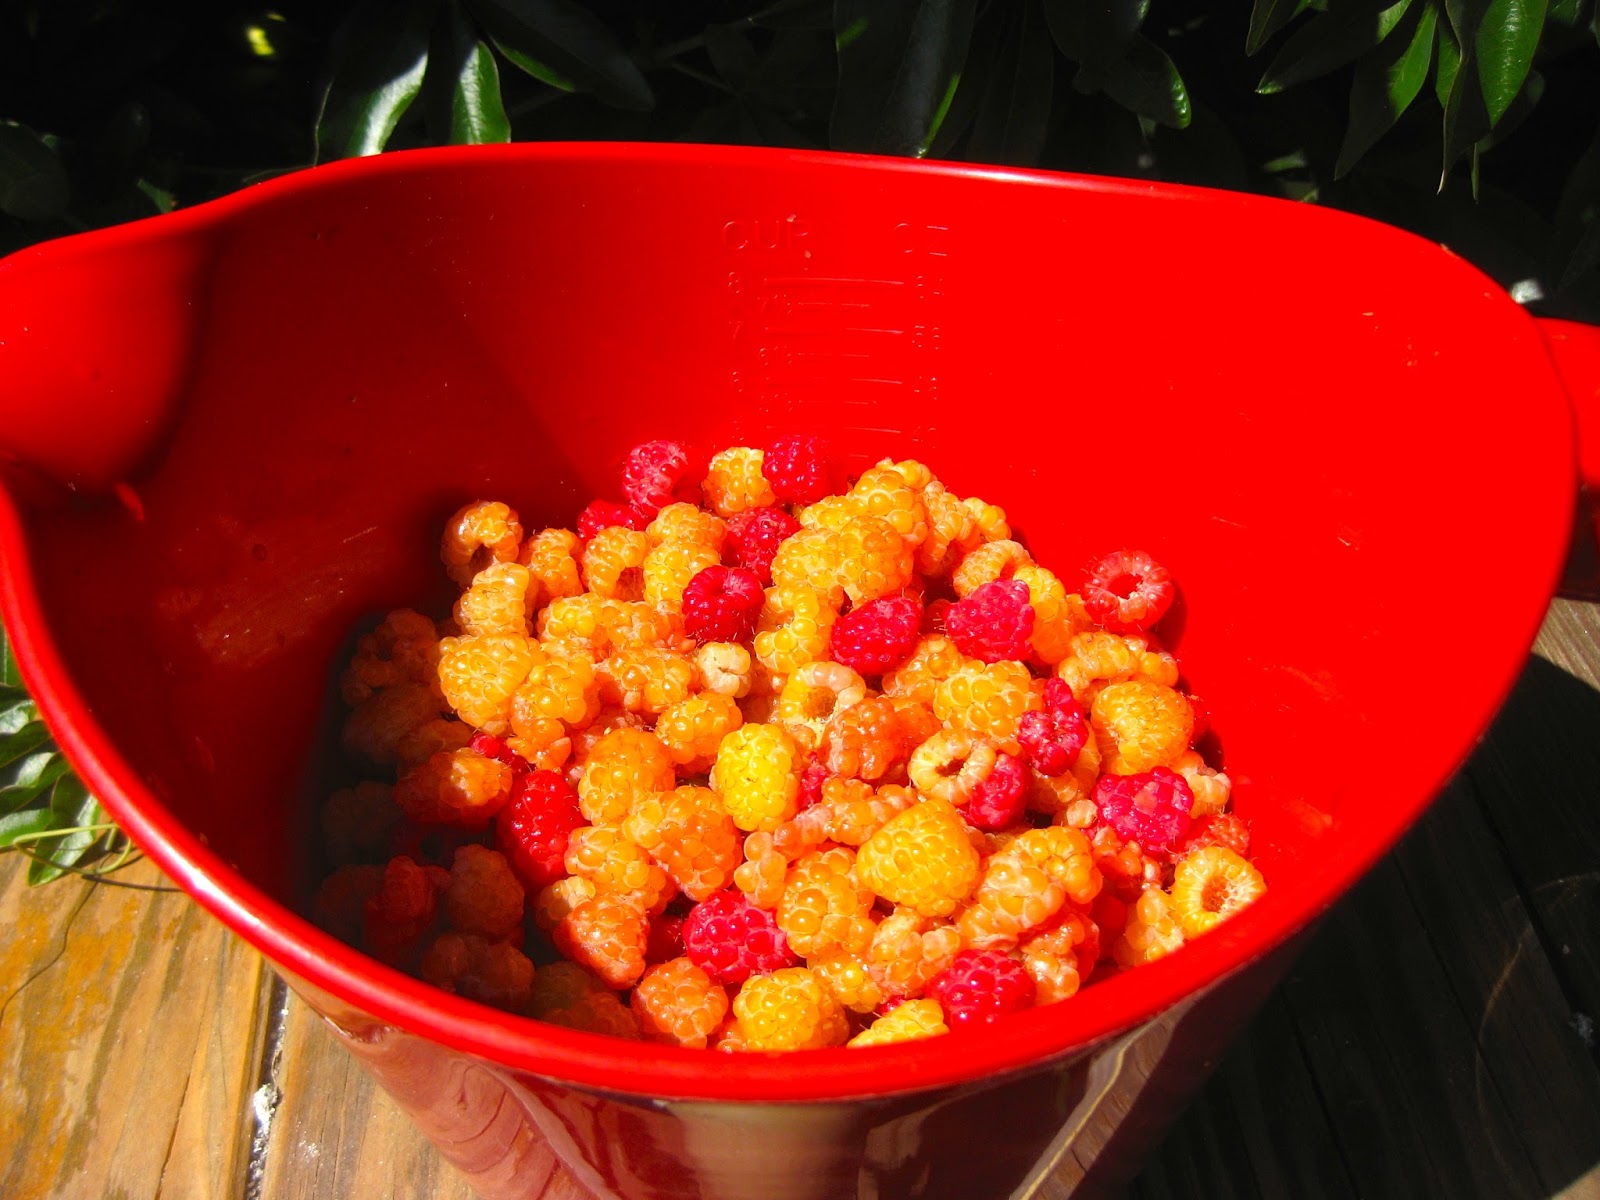
When all of our guest had left we found that we had a lot of cherries left over from their visit. I like cherries but there was a lot of cherries left at the house so I decided to make some jam. I also had some strawberries so I added those to the mix. A friend had given me some funky scissors last summer that she was using to chop herbs. I was able to use these scissors to cut up the cherries for the jam. I used my FreshTech Jam Machine and came up with 4 half pints + of Cherry, Strawberry Vanilla Jam (I gave away one of the half pints before I was able to take a photo). I think it used a little  too much vanilla in the jam, I used 2 vanilla beans and really I should have used only one. Then luck struck again...my neighbor Jessie pointed out a Golden Raspberry batch in the community garden (I thought it was just a bush of unripe raspberries), it was FULL of ripe raspberries. I picked a lot to make jam, but ended up eating some so I did not get as much jam as I had hoped. The golden raspberries if you have never had them are wonderful. They have a very fresh raspberry taste and are oh so sweet. The only down side that I found in the golden raspberries is they seem to have more seeds then red raspberries. I strain about 1/2 of the raspberries when I make jam so I don't get a seed filled jam. I think I strained about 3/4 of the golden raspberries before I made the jam. I had to add about a pint of red's to this jam to get the 3 cups needed to make the jam in my FreshTech machine. I think the red's helped make the jam a lovely golden rose color. I also added 1/2 a vanilla bean, this gave the jam a lovely flavor.    
I have been working on the churn dash quilt block. I have seen the block in older quilts and it seems to be on a lot of quilting blogs lately. So I decided to take a stab at making a churn dash block. I messed with different ways to use the squares and I really like making a red cross on the center. I think I will make a few more and see what they look like mixed together. It's a fun block but a little fussy which is not my style of quilting. I'm a pretty messy quilter...I hate having to match up points. This block really needs the points to match....so I may only make this as a test to see if I can do it. 

Monday, February 16, 2015


This is what can happen to the light bulb when the cement settles and the water evaporates leaving a space of about 1/2 an inch in the light bulb. The metal base of the light bulb will fall away and lets face it...the screw in end of the light bulb is what really makes people realize it's light bulb once all the glass has been broken away. It's hard to fill the lightbulb once the cement has dried, but you can remove the glass and try to fill in the gaps with cement or grout. A colored grout would look interesting if you wanted to really change the look of the lightbulb. Or you can use a simple grey grout so it looks like there was never an air bubble in the piece. I filled the holes with cement, than let the cement dry for a couple of hours. I then went back and used some sand paper to smooth out where I filled the hole. It looks OK and most people will not even see the flaw. But sometimes it's just best to admit it failed and move on to the next project. Like the flood lightbulb, it's really hard to get all the air bubbles out. I will get these looking fairly smooth but next time I will tap the bottom of the lightbulb a lot more so I can dislodge more of the air bubbles. As for the flood lightbulb, it may be a goner, I will let you know if I come up with a fix. 


I finished the Wonky Star Quilt top. I really like this quilt block it's simple and you can use up a scraps for the star points. I liked fussy cutting the centers with some of fabric that had cute motifs. I used several light color pieces for the background, the light blue is from some of my father in laws shirts. He had about 5 of these light blue shirts that he always wore, he even went and bought 5 new ones just before he passed away. He told me that I should use his old shirts as rags, so I cut them up for a quilt. 

Monday, January 26, 2015

A trip to Astoria & some more 

Wonky Star quilt blocks


When I started this blog I told myself that I would post at least twice a week. I read a lot of blogs and I'm really disappointed with blogs that don't post anything for months on end. Then I started posting and I realized that some times life gets in the way and you really don't want to sit in front of a computer and write. Last week we got out of town for a couple of days and went to Astoria. My husband loves this restaurant called Drina Daisy, they cook a full lamb and you can get a platter of lamb with fresh fruit and vegetables. It's a wonderful place if you are every in Astoria. We stay at Commodore Hotel they have the most comfortable beads. The rooms are inexpensive because the bath & shower are down the hall, though they have some suites with a full bath and tub. My mother informed me that she could never stay in a hotel that the bath was down the hall, I let her know the bath was less than 10 ft from our room and the shower rooms were large, beautiful and very clean.  I guess she is afraid of running into someone in the hallway at 1am on her way to the bathroom, I let her know I never had a problem with that issue. But if you are timid (they provide bathrobes in all the rooms) that you should stay someplace else. We went to a couple of thrift stores where I found Astoria has a great selection of books. I usually look for paint by numbers, needlepoints, scrap fabric, books and then I look for a new butter dish (my husband broke my favorite butter dish a couple years ago, he blamed it on the cat!). I had the perfect butter dish it was an small old pyrex glass container that was red with a glass lid, it fit a cube of butter perfectly. Now all you can get are ones with plastic lids.  I can buy it on ebay but some times it's so much more fun to find one at a thrift store or garage sale. I digress. While we were out driving around we saw several interesting thing..at one house we saw an 8 point buck eating the grass a couple blocks later we saw a couple of deer walking down the street, we then passed a sculptural park called Garden of Surging Waves. Since we were heading to dinner took note of where the park was and went to look for it later in the evening after dinner. It has some beautiful pieces including a large mosaic of 3 fish. There is another sculpture of the Monkey and the Dragon, of which the story of the statue is as follows: “A fiendish mythical dragon stirred up the waves in the ocean. Using one hand the wise monkey stroked and calmed the dragon, the other hand held up an incense burner.” Across the street from the park is the Elks lodge. We talked our way into the building and had a beer with the Exalted Ruler of the Astoria lodge. He gave us a tour of the building that was rebuilt after Astoria burned down in 1922. The building is amazing, it has a huge ball room with some very impressive stain glass, there are some impressive sweeping marble stairs that are lined with past Exalted  Rulers and past members. When got home on friday it was wet and rainy, I thought I would post something about the trip then, but I ended up spending the afternoon in bed reading. The weekend came and the weather was beautiful and I didn't want to sit in front of my computer. I have wanted to show you some of the wonky star blocks that I have been making, I see a quilt from this block pattern very soon.

Sunday, January 18, 2015

Wonky Star block

I have seen this block several times on various blogs, I even thought about taking a class at Modern Domestic to learn the block. I finally saw a this quilt & a this tutorial, it made me go down to my studio and try making this block. Thought my color choices were not boring but I like this block. The material I used was from shirts that my father in law use to wear. The striped shirt he gave me a couple  years ago to "toss out". I said the material was nice so he tole me to cut it up and use it for some thing else. I used the fabric as practice for Wonky Star Quilt Blocks. 
These blocks are very low contrast. I think a curtain out of some of these blocks combined with some handkerchiefs that I have from my father and my father in law, these would make some nice breezy curtains for the summer months. 

The tutorial from Wombat Quilts is great and she uses 5" squares. The basic foundation block is up to you, I made my blocks 4 1/2". I cut 8 of the blue squares and 4 of the stripped squares & one center block. I then cut the striped squares in half and sewed them to the blue squares as shown above. Sewing a striped piece with a 1/4" seam on the left side of the blue block diagonally, then overlapping slightly the right side and sewing a 1/4' seam. I then flip the blocks over and using the blue fabric as my guide I cut off the extra striped fabric. Lay out the blocks as you see below like a 9 block and sew them all together. You should have a 12 1/2" block, if not trim it all down a little. Or if it's too small you can add some fabric to one edge to make the block even more wonky.  

I can see me making a few more of these blocks but with a lot more contrast. Jane's Fabric & Quilts has some wonderful examples of wonky star quilt blocks. I like the idea of combining low impact colors for the background, light blue, cream & white's with some fussy cut centers and some bright points. I'm looking forward to playing with this block more.